A Designer Look For Pennies!
nat rosasco • May 23, 2019
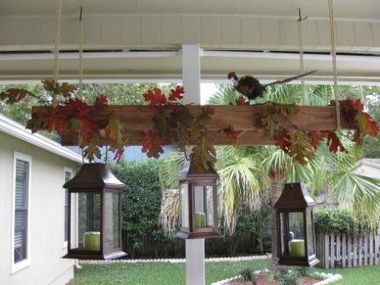
Inspiration for this unique indoor/outdoor décor came from a recent visit to a national retail/catalog store. A display such as pictured here was hanging over a dining table in the store, and with the right dining room you could put it there too.
But I don’t have a dining room suitable (or large enough) for a decorator item like this, so I chose to put my version outside on the patio. I think it worked out wonderfully.
The entire project took less than two hours not including shopping for the materials and adornments.
The adornments can be changed with each season such as colorful leaf garland for the Fall as featured in this posting or evergreen and pine cone garland for the Christmas holidays . . . you get the idea.
Here is a list of the items you will need to complete this project.
1. Hand or power saw
2. Power drill (Every house should have a cordless drill)
3. 1” hole saw drill bit adaptable for a power drill
4. One 8 foot 2”X4” piece of lumber which will be cut in half to create two 4 foot pieces. (A piece with knot holes will allow the burnt umber paint to add character to your project. Don’t use spruce outside but rather treated pine.)
5. Five one inch dowel rods each cut 16” in length which can be purchased at any home improvement or craft store. (Home improvement stores offer both 48” and 36” pieces, so you will need one 48” and one 36” piece and don’t forget, measure twice cut once.)
6. One bottle of burnt umber which you can purchase at any craft store and a clean rag for applying the paint.
7. Wood glue
8. Package of ¼” Sisal rope
9. 4 Screw hooks #6
10. Heavy duty jute twine
11. 3 lanterns & greenery
Approximate cost for the materials excluding lanterns and greenery:
1” hole saw $ 5.00
8 foot 2”X4” 3.00
Dowel rods 8.00
Burnt umber 1.00
Wood glue 1.00
Sisal rope 5.00
Screw hooks 5.00
Jute twine 3.00
Total $31.00
First start with two 4’ 2X4 pieces of lumber and use your drill to make the 1 inch round holes in the center of each piece every 8 inches for a total of 5 holes in which to insert the dowel rods. Find the center of the lumber and make a mark every 8 inches. Use that mark to position the point of the drill bit to begin drilling the holes. I drilled each hole ½ inch deep. This will leave 8” at each end to hang the ladder. I placed the rope 4 inches from each end.
When all of the holes are drilled, lay one piece of lumber on the floor and pour glue into each hole. Then insert the 5 dowel rods into each hole and let the glue set for about 30 minutes. Wipe off any excess glue which may have oozed out.
Then lay the second piece of lumber on the floor and pour glue into each hole. This time you will insert the ends of the dowel rods now affixed to the other half of the ladder and wipe off any excess glue.
The pressure of a bar clamp or vice would ensure a stronger bond but if you don’t have either, you can place something heavy on the top of the ladder standing on its side which will have the same affect. Let the glue set overnight.
Score the lumber to give it a weathered look and the paint will highlight the imperfections in the lumber giving it more of an aged look. Apply the paint with a clean cloth or sponge. The amount of paint you apply is a personal choice.
You are now ready to hang and decorate your ladder.
Ensure at least two of the #6 hooks are screwed into joists or that you use toggle bolts in the ceiling as the ladder is a little heavy.
Determine how far from the ceiling you want to hang the ladder and add enough length to tie a double knot at the end. The sisal rope should be doubled for support. Hold the two ends of the rope that are tied together bringing it through the looped end to create a circle, slide and pull tight around one end of the ladder. Repeat the process for the other three supports.
Hang your ladder from the screw hooks, affix the lanterns with the jute twill at the desired length and decorate to your heart’s content.
I know you will be excited about the end result and smile at the compliments from family and friends on a job well-done!

I like to think of home staging as the process of getting your home and its contents ready to present to a very wide audience. Hopefully lots of different people will visit your home and they will represent a whole host of differing ideas of what’s appealing and what isn’t. How well you complete the staging process will have a major impact on a buyer’s impression of your home. Let’s be clear too on the difference between getting your home ready to sell and staging the home. They’re not always the same. A thorough cleaning and making needed repairs is necessary and part of your overall preparation, but staging is something else entirely. Think of staging as more of an artistic endeavor; furniture layouts, lighting, removing nonessential items from shelves and so forth. That’s staging. The purpose of staging a home to sell is simply to make your home appear as attractive and enticing as it possibly can be in the eyes of a large and diversified audience of potential buyers.
You have to think like a buyer. This will help immeasurably as you prepare your home for viewing by strangers. Getting organized early. You are going to have to pack everything when you move, right? So clearing out closets and reducing clutter on shelves gets you started on that chore. It’s called de-cluttering and it is of paramount importance. The prospects of selling your home improve. Buyers want to see a clean and well organized property. Staging helps in that regard tremendously. Staging can have a dramatic effect on how fast your home will sell. And it goes without saying that speed is good. Once you have decided to move it’s usually a process you want to finish as quickly as possible, particularly if you buy a new home before selling the one you’re in now. Two mortgages can ruin a savings account. Staging just might be the difference in getting what you’re asking in terms of price. There’s little doubt that a seller’s market means little or no haggling over price. But a buyer’s market means you will need to do everything you can to justify the asking price. Staging can go a long way in that regard. You might even enjoy it. Yes, it will be a lot like work, but it is really a creative endeavor first and foremost. The challenge of using your creative ideas to make your home more attractive to potential buyers can be immensely rewarding on more than just an economic level. Achievement in conceiving and executing a plan has its own rewards.

The home’s exterior is an equally important (but often overlooked) home staging priority. Curb appeal is when potential buyers pull up to the curb in front of your home and see it for the first time. First impressions are lasting, and if buyers have a frown on their face as they leave their cars and walk to your front door, you have problems. Here are some tips to stage the exterior for maximum curb appeal. Go out to the curb in front of your house with a notepad and pen. Jot down anything that “leaps” out at you. And here’s an idea. Get a friend to do the same thing. Others may see things you’ll miss for one reason or another. Then combine the lists and you’re off and running. How does the paint look? How about the front door and shutters? Make sure everything looks as if it was recently done. A mowed and trimmed lawn and garden beds are a must. Depending on where you live you may have to mow and trim every few days to keep things looking first rate. Mulch your garden beds and trim flowers and shrubs. Mulch is inexpensive and easily available. Use potted plants to brighten up the entrance area. There is evidence that yellow should be the color of choice. Look at the picture here and notice the effect of the yellow flowers among the red. Psychologists suggest yellow makes people comfortable and at ease. Take advantage of it. And potted plants can be moved around to create different effects. This next item falls into the “I don’t want to…” category for many people, but it is really a must-do. Make sure there are no weeds in the garden, and look several times a week because those pesky weeds can sprout overnight. Oh, and keep looking right up until the house sale closes. In the fall, be sure to rake leaves from your lawn and also from flower beds. Do this every couple of days, or as needed to keep the lawn free of leaves. Trim bushes and trees as needed to give a tidy appearance. In particular, make sure they are not blocking windows or doors. Make sure windows are spotless, and this means inside and out. Be sure the window frames and shutters are thoroughly cleaned as well. This adds a lot to your overall curb appeal. If you have a porch with railings, make sure they’re clean. Is the porch large enough for furniture? Does it look inviting as a place to sit and relax? If so, give careful consideration to putting some comfortable furniture there if you haven’t done so already. Remember, the outside of your home is the first impression. Make it count!
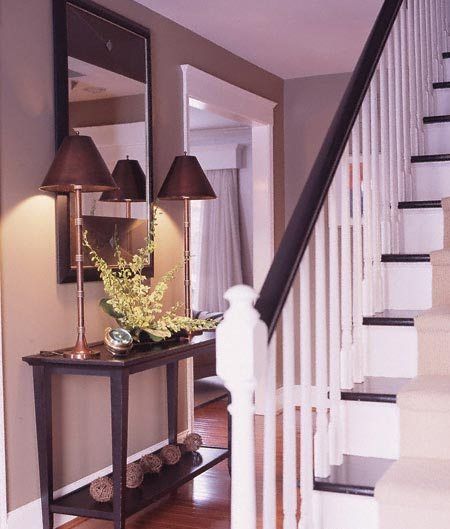
Here is where the potential buyer first transitions from looking at the exterior of your home to the interior. It’s where the first and perhaps most important impression of the living area is made. As with curb appeal, if the buyer first sees a well maintained entryway the proper mindset has been achieved. On the other hand, if there is clutter all about, you will have lost an important opportunity for a good first impression. Here are some tips for properly staging the entry area of your home. Keeping the entryway free of clutter will make the house seem larger. That’s usually a good way to start. To the extent possible, make sure the entryway is well lit or otherwise bright and inviting. Is a new welcome mat needed? It’s essential it be what it is supposed to be, welcoming. If need be, buy a new one. Bottom line here is, don’t neglect the entryway when you’re staging your home for resale.
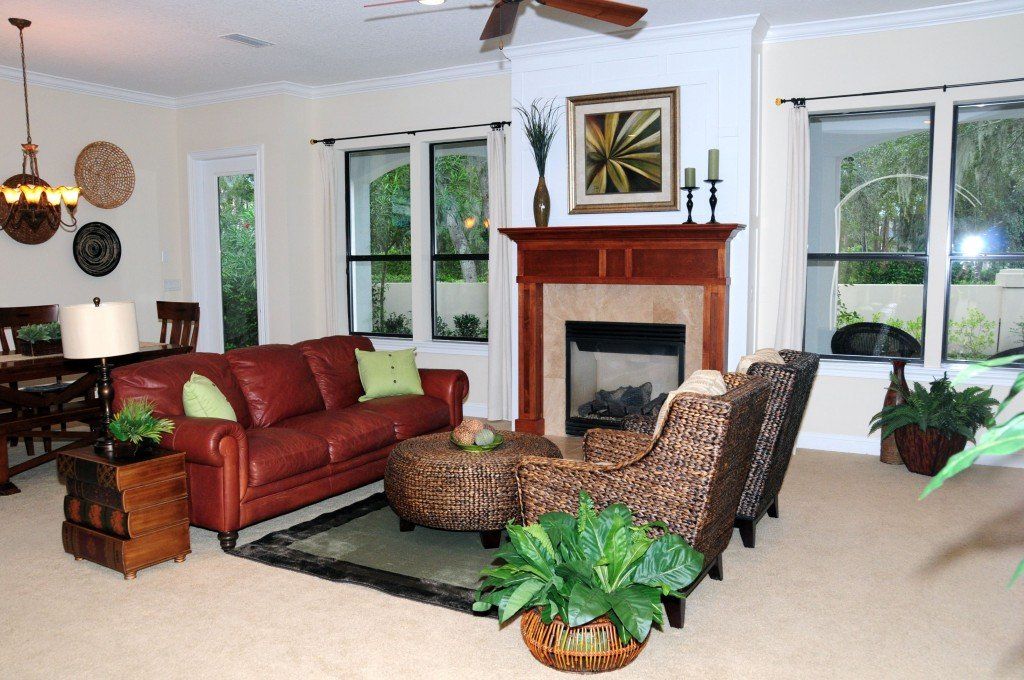
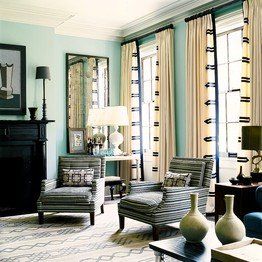
These rooms in the home are usually where families gather most often. The two rooms will also serve as entertainment centers for both the family and guests. You can expect potential home buyers to look at these rooms accordingly, and it is essential they be warm and inviting. It is particularly important to remove personal photographs (both on the walls and on tables) that remind buyers they don’t live there. After all, you want buyers to be able to envision themselves in your home, and that’s difficult when looking at others’ photographs or portraiture. Arrange the room so as to promote conversation, if it’s not that way already. A warm paint color for the living room is a good idea. Use neutral tones here but that doesn’t limit you to beige. There are plenty of warm colors you can try, such as soft shades of green, blue, or brown. "Neutral" never has to be boring. A neutral color scheme can be brought alive with colorful accent items, such as pillows and rugs. Color-coordinate these items for a professionally designed appearance. Too much furniture tends to create a crowded, even claustrophobic, feeling. The room needs to breathe. If it’s hard to walk through because of having too much furniture, remove some items and place them in storage. Consider renting furniture for staging purposes. You may love your old college furniture but potential buyers won’t. If the furniture has that worn look but is otherwise in perfectly good shape, I suggest using a slip cover as a low-cost way to enhance the appearance of your sofa and chairs. Slip covers can also help soften overly bright or "loud" fabric colors. Make sure the mantle is not overloaded with knick knacks. Opt instead for a vase or flower arrangement. Just a couple of items should be sufficient. Here’s an important tip. A fireplace (if you have one) should be the focal point of the room. Arrange seating to face the fireplace. And, believe it or not, if you have a huge television, consider removing it. It will draw attention away from the fireplace. To sum it up for these rooms, people want a living room or family room area that seems open, airy, and inviting. When people naturally want to sit down and spend time in the room, you’ve achieved your home-staging goals for the room!
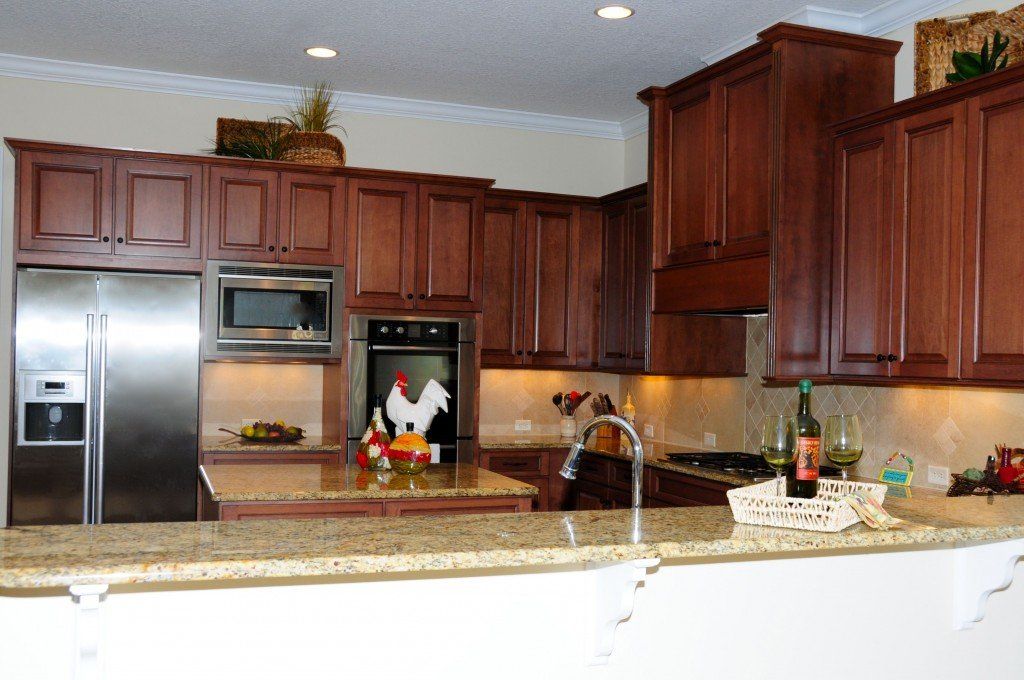
Kitchens have a lot to do with resale value because people spend a lot of time in their kitchens. Properly staged, the kitchen will help them see themselves in the home and that will help increase the likelihood of a sale, the whole point of home staging in the first place. Here are some ways to stage your home’s kitchen in order to get the maximum positive reaction from buyers. Kitchens are notorious for being full of clutter. When you stage this area of your home be ruthless about removing unnecessary items. Countertop appliances, utensils, the coffee pot, should all be put away, out of sight, as shown here. Pay particular attention to cleaning the sink, counters, stove, etc. Everything needs to be extra special clean and sparkling. Lights should be on and the curtains open to showcase the sparkle. If you have dark areas in the kitchen, consider adding some lighting there. If you’re in a buyer’s market, it might be worth thinking about upgrading your cabinets, even the counters. With a budget in mind, an inexpensive way to make the cabinets stand out is to invest in some new hardware, or install hardware if it isn’t already there. You’ll be amazed at what a few knobs or handles can do. If it doesn’t make sense to pour extra money into cabinetry, try staining or painting the cabinets. You’ll get a big improvement at a fraction of the cost. Changing out your kitchen faucets, lights and other fixtures is another relatively inexpensive way to update the entire space. Don’t forget the effect of a fresh coat of paint. And the comments about painting the living/family rooms apply here as well. Also, if the kitchen is connected to the living/family room, use either the same color paint — or one shade lighter or darker. This will make the eye flow from one room to the next, making the entire place seem more spacious. Finally, if you have an eat-in kitchen make sure buyers can envision that feature. Show it to them by setting a small table there complete with flatware, glassware, and every day dishes. A single silk flower in a small vase would be a nice touch too. As people spend a lot of time in their kitchens, devoting some extra time and/or money in staging the kitchen is a real good idea. Realtors will confirm that kitchens sell homes more than any other room in the house.
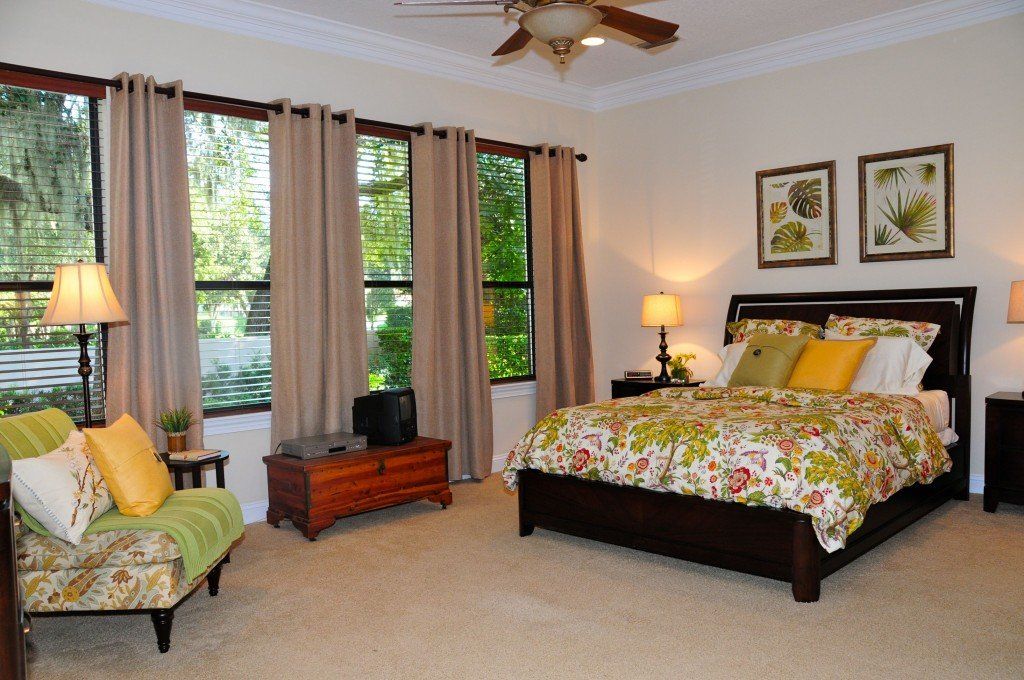
Regardless of anything your home’s bedrooms may have that set them apart, a skylight, direct access to the patio, or a fireplace for instance, the most important aspects of staging a bedroom comfort and space. That’s what potential buyers want to see and feel in a bedroom. You do this with neutral paint color, furniture arrangement, lighting, and perhaps a few accessory pieces. So with that in mind: Earth tones (or any soft color) for paint and overall color schemes will appeal to most buyers. Keep the furniture to a minimum; a bed, dresser, and one or two other items is enough unless you have an unusually large bedroom. Either way, the idea is to make the room seem as large as possible. Too many furniture pieces will likely convey a cramped feeling. Thin out the clothes in your closets, and I suggest you really take out most of them. You’re going to have to pack them eventually, so get as much of it done now as you possibly can. Your closets will appear larger and that’s a good thing. A home can’t have enough closet space. Buy new, top quality bedding. It will improve the look of the bedrooms, and as you will be taking it with you when you leave, consider it an investment in getting your home sold. Remove personal items such as photos. The purpose here is for buyers to see themselves in the home … not you and your family. The idea here is to make a bedroom seem as an ideal place to relax. Do all the things outlined above and you will have done that well.
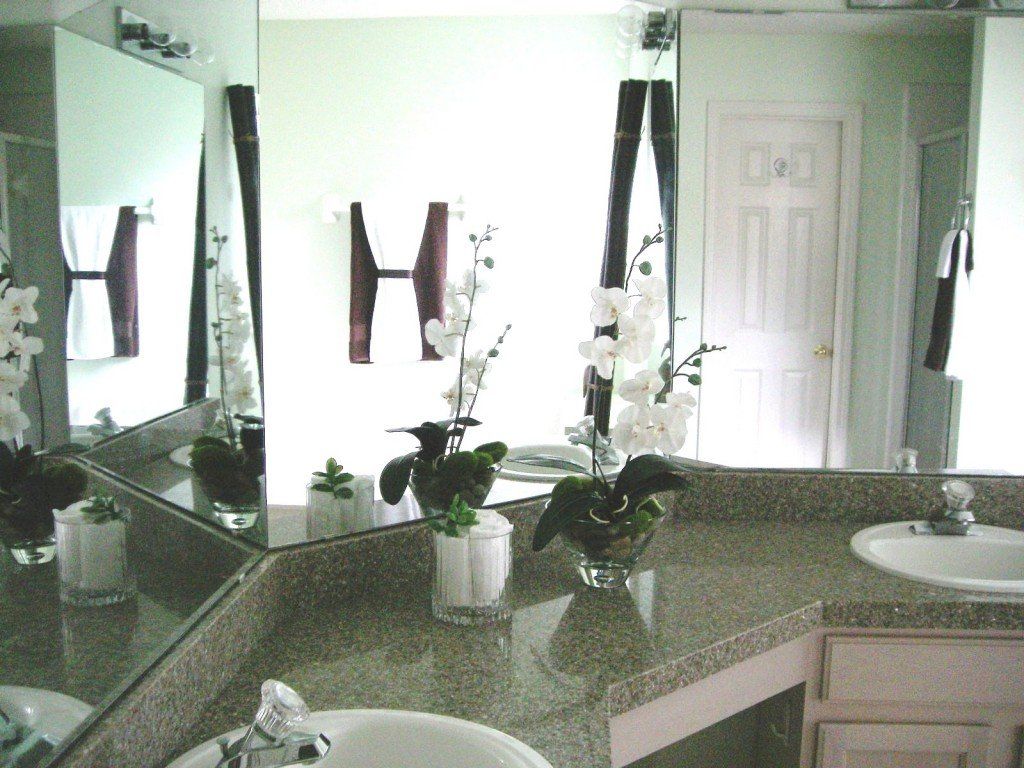
Right up there with kitchens in terms of important rooms in the home for buyers are bathrooms. Every do-it-yourself magazine or television show, and every realtor I have spoken with confirms that kitchens and baths will help most in determining resale value. A clean countertop is important Clean and bright with up-to-date fixtures are the keys to staging a bathroom. Add luxurious and you’ll get an even better reaction form potential buyers. So… If your bathroom fixtures (handles, spigots, etc.) are outdated, replace them with sleek and modern fixtures, but stay away from anything trendy. You’ll want to have some high-quality plush towels on the towel rack. And they should be color-coordinated with the wall paint and rugs as well as any decorator items you have in there. Fresh flower arrangements are a must. They look and smell marvelous here. Make sure the bathrooms look as if they belong in a model home. Any signs of use will be a big negative. Get the soap scum out of the shower and off the counter tops. Make sure the fixtures are freshly shined. Shower doors need to be spotless. You can take them outside for cleaning with muriatic acid and water (1/10) if need be. Use a little steel wool and elbow grease and you’ll be good to go. Are the sinks in good shape? If not consider replacing them along with up to date fixtures. It will be money well spent. It all boils down to this. If the bathrooms and kitchen are first rate, realtors will make a big deal of it. You’ll be half way to a sale already.
Our home is ours, meaning it reflects our tastes and sense of comfortability. And that’s as it should be nearly all of the time…except perhaps when it’s time to move on, to sell your home. Then it’s better to take a step back and consider what a stranger will think upon entering your home with the idea he or she might want to buy it. This is where it can be extremely difficult for any of us to be objective. We like what we have in our homes, what pictures are showing, what books are on the shelves, the knick knacks we’ve collected over the years that are here and there. But that may not be what the stanger entering your home for the first time might like. So what to do? In the simplest terms, you have to de-clutter and make your home look like a model home you’d see at any developer’s site. Now you can’t make your home look ‘new’ but you can make it look less personal, and in doing that you’ll likely arrange your home so as to be appealing to a much larger audience than if it was still filled with your personal stuff. Remember this. When friends and family members enter your home they expect, and welcome, the signs that you live there. They expect to see photos of themselves and reminders of past events that they probably participated in. But a potential buyer doesn’t have that same feeling. All he or she really wants to see at the outset is how large (or small) the home is and what they…they…might do with it. If there’s too much of your ‘stuff’ around they won’t be able to get as clear a picture of themselves living there. So, can you do that? If you’re like most of us the answer will be a gentle ‘no’. It isn’t likely you’ll want to move everything from the favored places they occupy in your world. You’ll rationalize about moving this picture, or that momento, or leaving the furniture arranged as it always has been. Rather, you need the help of someone not personally involved with your stuff to make decisions like that. And that’s where I come in. I have the experience and the design sense that may prove helpful to you in this regard. I can help with the creativity needed to make your home as saleable as it can be to the widest possible audience of potential buyers. Let’s see what we can do, and I’ll do it without a significant dent to your wallet or purse, too.
Here’s an article from a weekend edition of The Wall Street Journal that addresses the question of just exactly how high to hang those drapes you’ve just bought for your living room. Turns out there’s more than one consideration in determining the proper height. And while many of us won’t have those beautiful high ceilings portrayed in the article, the advice given is nonetheless worthy of your consideration. So click on the link right here below. Where To: The Right Height for Curtains – WSJ.com.